
Putting Your Home Gym to Use
/Warmer weather is coming and outdoor activities are starting to become a bigger interest than the normal gym regimen. If you have made it past the first two months of the year and are now firing on all cylinders, I applaud you. Still, the time has come when I start to see the gyms become less crowded, the training clients decline.
Now it’s time to utilize that home gym we purchased to kick start our fitness journey. Hopefully, you were able to get a good trainer and with the in-home equipment, you can now have them explain what you can do with it. If you didn’t go the trainer route, in this article you will get some helpful info on what to do, including links to tutorial videos from some of the top trainers in the industry.
Kettlebell
The most versatile piece of equipment in your arsenal at least in my opinion, multipurpose in every shape and form. From power to strength, reshaping or stabilization the kettlebell can do it all. Let’s begin from the ground up:
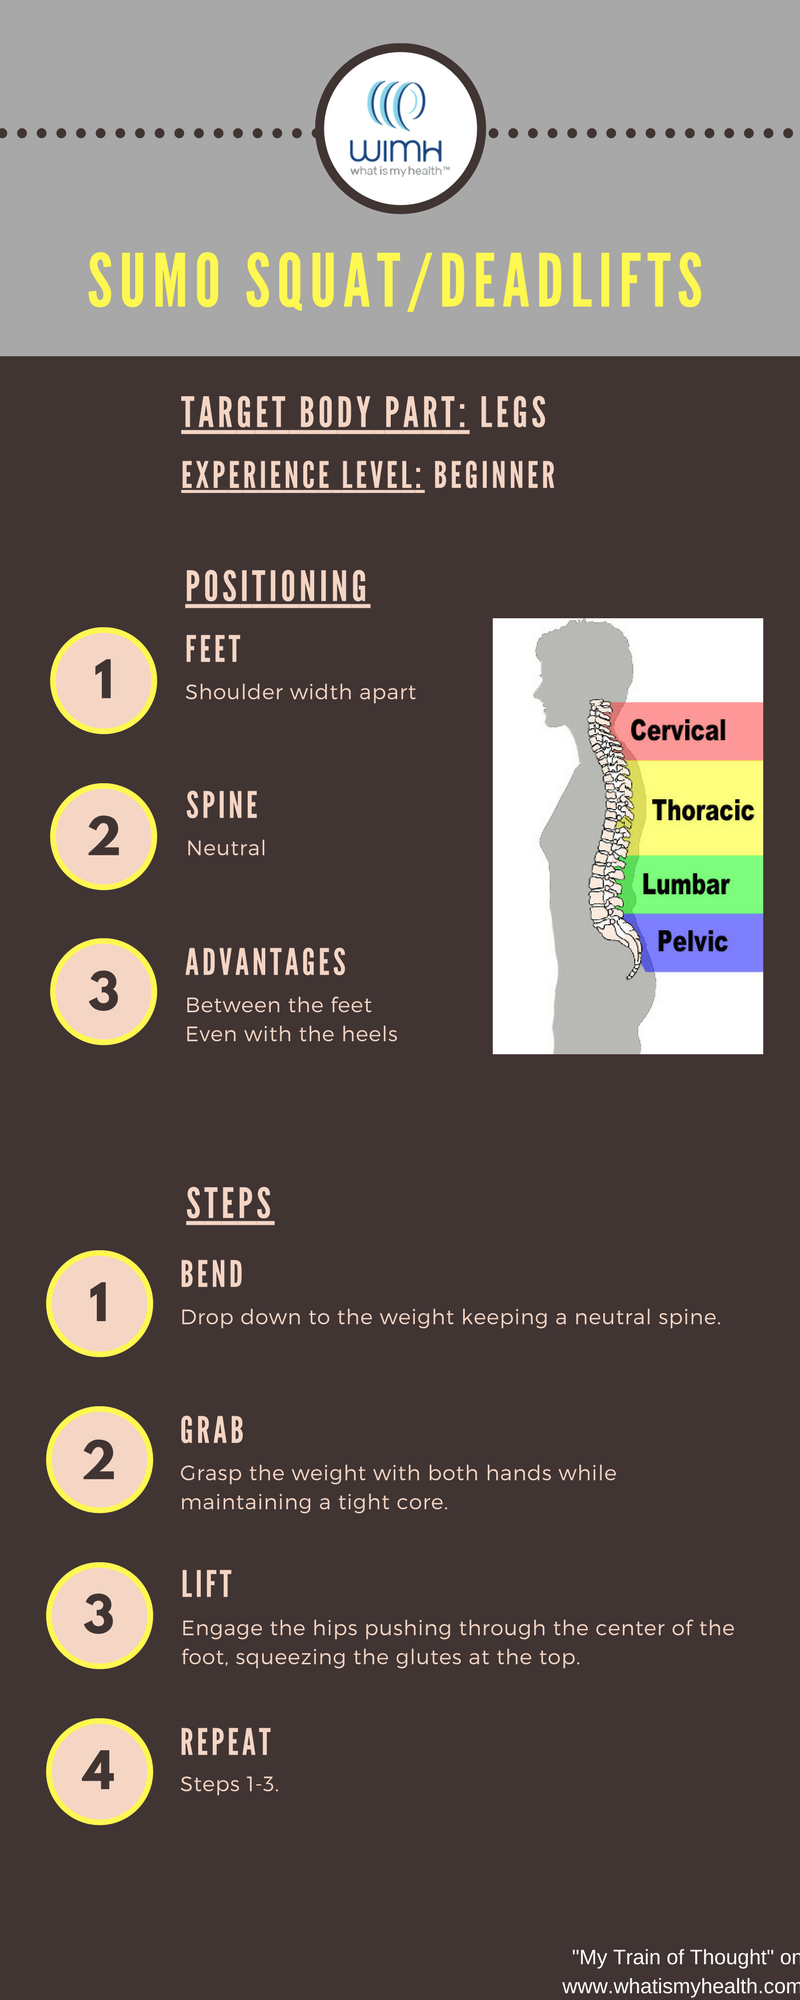
Exercise: Sumo Squats/Deadlifts
Target body part(s): Legs
Level: Beginner
Purpose: Sumo squats are used for strength training mainly, but can also be used for endurance or max strength as well. This exercise takes the whole body to complete correctly but mainly targets the legs.
Precautions: This is an exercise I use for people who have poor ability to squat with a load. For most of my clients, it is somewhat easier for me to teach this than to have them use a barbell or goblet squat. The tough thing about this exercise is that if you lack mobility, then it will be hard to complete it effectively and efficiently. What I mean by that is if you lack the ability to keep a tight core while squatting, or if you cannot have your feet hip- to shoulder-width apart, you will risk failing.
How to: Sumo Squats/Deadlifts
How to do Sumo Squats/Deadlifts:
Positioning:
Feet shoulder-width apart
Neutral spine
Weight between the feet even with the heels
Steps:
1. Drop down to the weight with a neutral spine
2. Grasp with both hands while maintaining a tight core
3. Engage the hips pushing through the center of the foot, squeezing the glutes at the top
4. Repeat steps 1-3
Here’s a video to help guide you: "A Refresher on Deadlifts"
Now let’s talk about some power:
Exercise: Kettle Swing
Target body part(s): Hips (whole body engaged)
Level: Advanced
Purpose: The kettle swing an advanced movement able to help increase power, and is recommended for more advanced lifters only.
Precautions: With bad instruction and too much ego, this exercise could go from good to bad in a matter of seconds and become an injury-causing exercise. I recommend aiming small at first. By that I mean mastering the small movements and sequences before you perform the complete exercise.

How to: Kettlebell Swings
How to do Kettle Swings:
Positioning:
Feet shoulder-width apart
Neutral spine
Weight between the feet even with the heels
Steps:
1. Drop down to the weight with a neutral spine
2. Grasp with both hands while maintaining a tight core.
3. Stand up. Create flexion by pushing the hips back, and creating angle with the spine
4. Drive through the feet using the hips to generate force to the weight.
* Do not hyperextend spine and hips
* Do not use arms to pull weight up
Here’s a video to help guide you:"How to Properly Perform and Teach the Kettlebell Swing"
Moving on, let's talk about the suspension trainer:
Suspension Trainer
Exercise: Body Weight Rows
Target Body Part(s): Lats (back)
Level: Beginner
Purpose: The most basic beginner exercise I could give is the body weight row. Extremely easy to complete with the ability to increase the difficulty, everyone should be able to pull their own body weight for this exercise. And even if you cannot, this is a great way to start.
Precautions: No real disadvantages to this exercises that I see; it is relatively easy and very effective.
How to do Body Weight Rows:
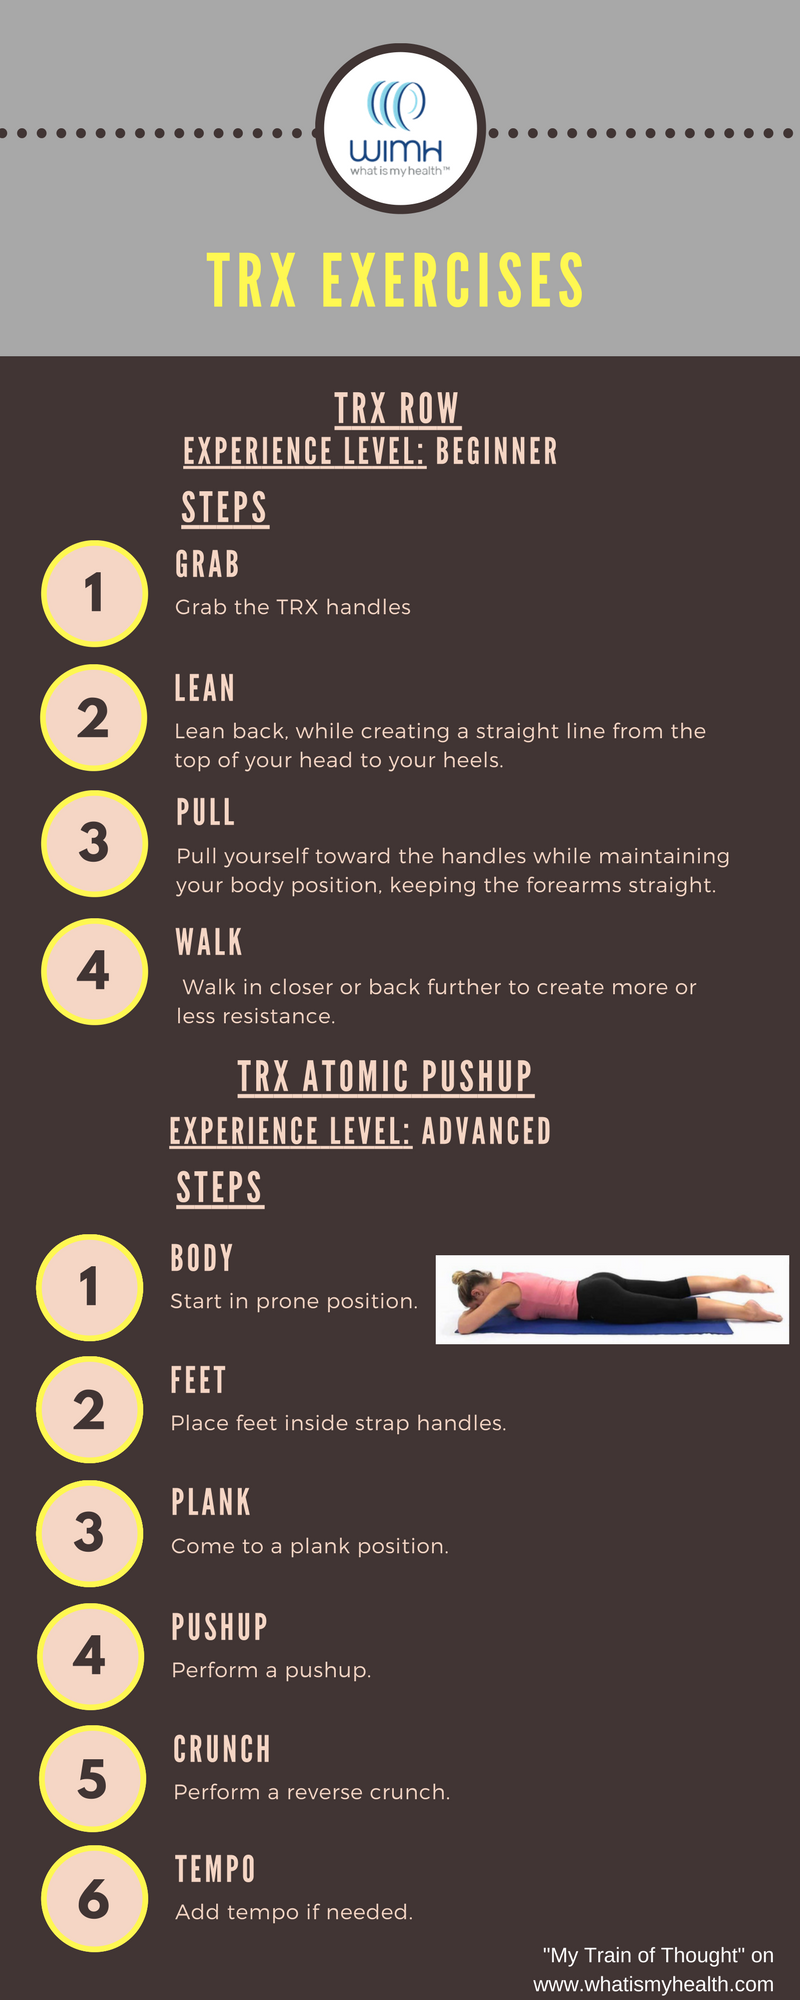
How to: TRX Exercises
Steps:
1. Grab handles
2. Lean back, while creating a straight line from the top of your head to your heels.
3. Pull yourself toward the handles while maintaining your body position, keeping the forearms straight
4. Walk in closer or back further to create more or less resistance
Here’s a video to help guide you: "TRX Back Row"
Exercise: Atomic Pushups
Target body part(s): Chest, core
Level: Advanced
Purpose: Let’s get a little adventurous here, the atomic pushup. Just as it sounds, it is hard to accomplish but it is fast and effective with variations of difficulty. It creates speed, power, strength, and endurance, and targets the chest and core.
Precautions: The problem with this exercise is only the advanced clients can perform this. I use this as a goal-setter and a measuring stick for my most fit clients.
How to do Atomic Pushups:
Steps:
1. Start in prone position
2. Place feet inside strap handles
3. Come to a plank position
4. Perform pushup
5. Perform reverse crunch
6. Add in tempo if needed
Here's a video to help guide you: "TRX Atomic Push-Up Tempo Challenge"
Finally, let’s roll all the final pieces of your home gym together- the foam roller, mini bands and yoga mat. I use all of these items for injury prevention, effective warmups, creating increased range of motion, activation, and my cooldowns.
Foam Roller
The foam roller can be used for two aspects during the warmup:
1. To help wake up the central nervous system and stimulate muscle tissue, and
2. To increase mobility through SMR (self-myofascial release)
Mini Bands
The mini bands are overlooked greatly but are a small piece of equipment vital to your arsenal. Many people do not create strength in those areas, and tend to be more quad-dominant. Instead, I recommend using them for activation of the glutes prior to a workout. This increases hip stabilization and strengthens the hips and glutes safely.
To do the mini band workouts:
1. Step into mini band and place above the knee cap on both legs
2. Stand with your feet hip-width apart
3. Walk laterally (sideways) keeping your feet straight ahead and apart
4. Repeat in opposite direction
Yoga Mat
Finally, the yoga mat is great for yoga (obviously), but I use it for both my warm up and cool down. All of this is done on the mat so you have a comfortable place for both.
Now that you have the equipment and the exercises, here are two workouts you can do at home, one for beginners and one for more experienced exercisers:

Home Gym Workout- Beginner

Home Gym Workout- Advanced
Share your comments at the bottom of the page.
© Copyright Whatismyhealth, March 5th, 2017