
Can You Afford to Eat Healthy? (Part 1)
/Ever since I was in college, I have been hearing talk about how when you can’t afford to eat (like many college students), you eat ramen. While ramen is incredibly cheap and equally delicious, it isn’t the healthiest thing out there. Is it possible to eat healthily if you don’t spend a ton of money?
As someone who loves to cook, I found that I spend a lot more than I would like on groceries each week. Sometimes I find myself buying ingredients for a meal that I want to make, but then things come up during the week and I no longer have time to make it. Before you know it, all of the fresh stuff that I bought goes bad. It goes in the garbage and all of that food and money go to waste. This happens all too often.
While doing my 30-day plant-based eating challenge, I found that a lot of the meals I was making were very healthy AND very cheap. I was barely using oil or added sugars in many of the foods, and I was trying my best to use fresh ingredients. By not having to buy meat, I was already saving a lot on groceries. You can buy a big bag of dried beans for less than $2.00 and can last you over a month— depending on what you’re making, obviously. Canned beans go for around $0.99, and one can of beans can make enough food for 4 servings. Pair beans with some affordable grains and fresh produce and you can have yourself a really cheap meal that includes many of the nutrients you need.
The best part about including dried or canned beans in your meals is that if you choose to make something else that week or don’t have time, they aren’t going to go bad like fresh produce would. You can still use them at a later date so you aren’t wasting food or money. Once I realized all of this, I decided to try a new type of challenge: a Low-Budget Healthy Eating Challenge.
Getting Started
I wanted to know: How little can I spend on my groceries and still eat healthy? Will I be forced to eat pasta every night? Or, can I afford to actually eat healthy, filling meals? I was pretty excited to get started.
First thing’s first, I needed to come up with some money-saving plans. I know from previous experience that almost any spices you need you can get from the Dollar Tree, along with frozen fruits and vegetables. Also, grab some circulars from your local grocery stores (or check their website, since many stores post circulars online now) and see what’s on sale and which stores have the best prices. If the vegetables you want aren’t on sale, a lot of times frozen vegetables will work just fine.
Vegetables
I like frozen vegetables because they’re usually really low-cost (less than $2 per bag). They’re also already prepped which saves you time cooking. I find myself frequently buying store-brand frozen diced onions, pepper strips, and diced butternut squash. I use these all the time and they have about the same nutrients as the fresh stuff. I tend to use these for sautéing. By using frozen veggies, you don’t have to worrying about them going bad in the fridge, either.
Grains
I have found that you may need to shop around for grains. The good thing is that if one grain is too expensive, it’s really easy to substitute different grains in for each other in a recipe. Grains like quinoa can be expensive, so you can try substituting in rice or millet instead.
I was buying quick-cooking brown rice in a box and was going through it pretty quickly, but I just found that I can buy a huge bag of brown rice that isn’t quick cooking for the same exact price (I think I’ll be using my Instant Pot to make my rice for now on to speed up the process). I tend to cook most of my grains in vegetable stock, which can be expensive or add up over time. This week, I used the vegetable scraps from my first meal to make 3 quarts of broth- and it cost nothing extra! I just took the scraps and threw them in my Instant Pot, filled it with water and pushed the “broth” button. There are a bunch of easy ways to make the broth on your stovetop, too!
Planning
My last tip is to plan ahead. For each week, I planned three solid meals and one snack. While planning, try to find recipes that use things you already have in your pantry or freezer or that can double as a component in another meal. My snack this week, “Cowboy Caviar” doubles as a filling for stuffed zucchini and can be thrown into pasta or rice, or even an omelet if I need an extra meal or two. By planning ahead, I know what ingredients I need and can spend a little time looking for the best deals. For this week’s menu, I actually went to three different grocery stores to get the best prices, or to find items that the first store was out of.
So what’s on the menu? This week I made Brown Rice Breakfast Bowls, Banana-Oat Chocolate Chip Pancakes, Lentil Soup, Jambalaya, Vegetable Lo Mein, and vegan Zucchini Tacos. I was trying to keep my grocery bill under $40 a week for this challenge, and I ended up having $1.81 left over! Keep in mind, I did use some ingredients that I already had on-hand (which you’ll probably wind up doing, too) and that your serving sizes may vary, but this was more than enough food for my husband and I all week.
Meals
Breakfast
Banana-Oat Chocolate Chip Pancakes
~$1.00 per batch
For breakfast this week, I made two different things. First, I made Banana-Oat Chocolate Chip Pancakes using only ingredients that I had lying around the house, including some old bananas that would normally be thrown out or possibly frozen to make “ice cream” later. I always have oatmeal and whole wheat flour on hand so these were really easy to put together, and they were absolutely delicious.
I packed a few for my husband to take on his trip. He ate them two days after they were made and he said he didn’t even need any syrup or butter to top them with because they were so moist and flavorful. He didn’t even heat them up! This will definitely become a routine breakfast to use up those browning bananas!
The best part? This meal ended up costing $0 extra this week because it was all ingredients that I always have in the house anyway.

Brown Rice Breakfast Pudding
Photo credit: Alyssa DelSoldato
Brown Rice Breakfast Pudding
~$1.00 per serving
My other breakfast dish was from the same website. It was a Brown Rice Breakfast Pudding. Knowing that I would be making this, I also decided to add another rice dish to my meal plan for the week. I bought a bag of brown rice for just $3.59 which will probably last me a few weeks. I had raisins and dates on-hand from other recipes and I had already bought a half-gallon of unsweetened cashew milk for my coffee, so the only thing I had to buy was an apple. That one apple was just $0.93. This meal made four servings, each serving costing around $1.
Lunch and Dinner
Lentil Soup
~under $0.35 per serving
For the lentil soup, I used Betty Crocker's recipe. This was a perfect low-budget recipe because it requires very few ingredients and they’re all really inexpensive. I found a pound of dried lentils at my grocery store for just $1.19. It helped that I had leftover baby carrots in the fridge to use up and I had leftover vegetable broth to use, so the only other thing I had to buy was a can of tomato paste, which cost me $0.59. I made 6 servings for a total of $1.78, making each serving about $0.30 each. This meal was really filling and packed with protein; a half cup of dry lentils contains 26 grams of protein.

Lentil soup
Photo credit: Alyssa DelSoldato
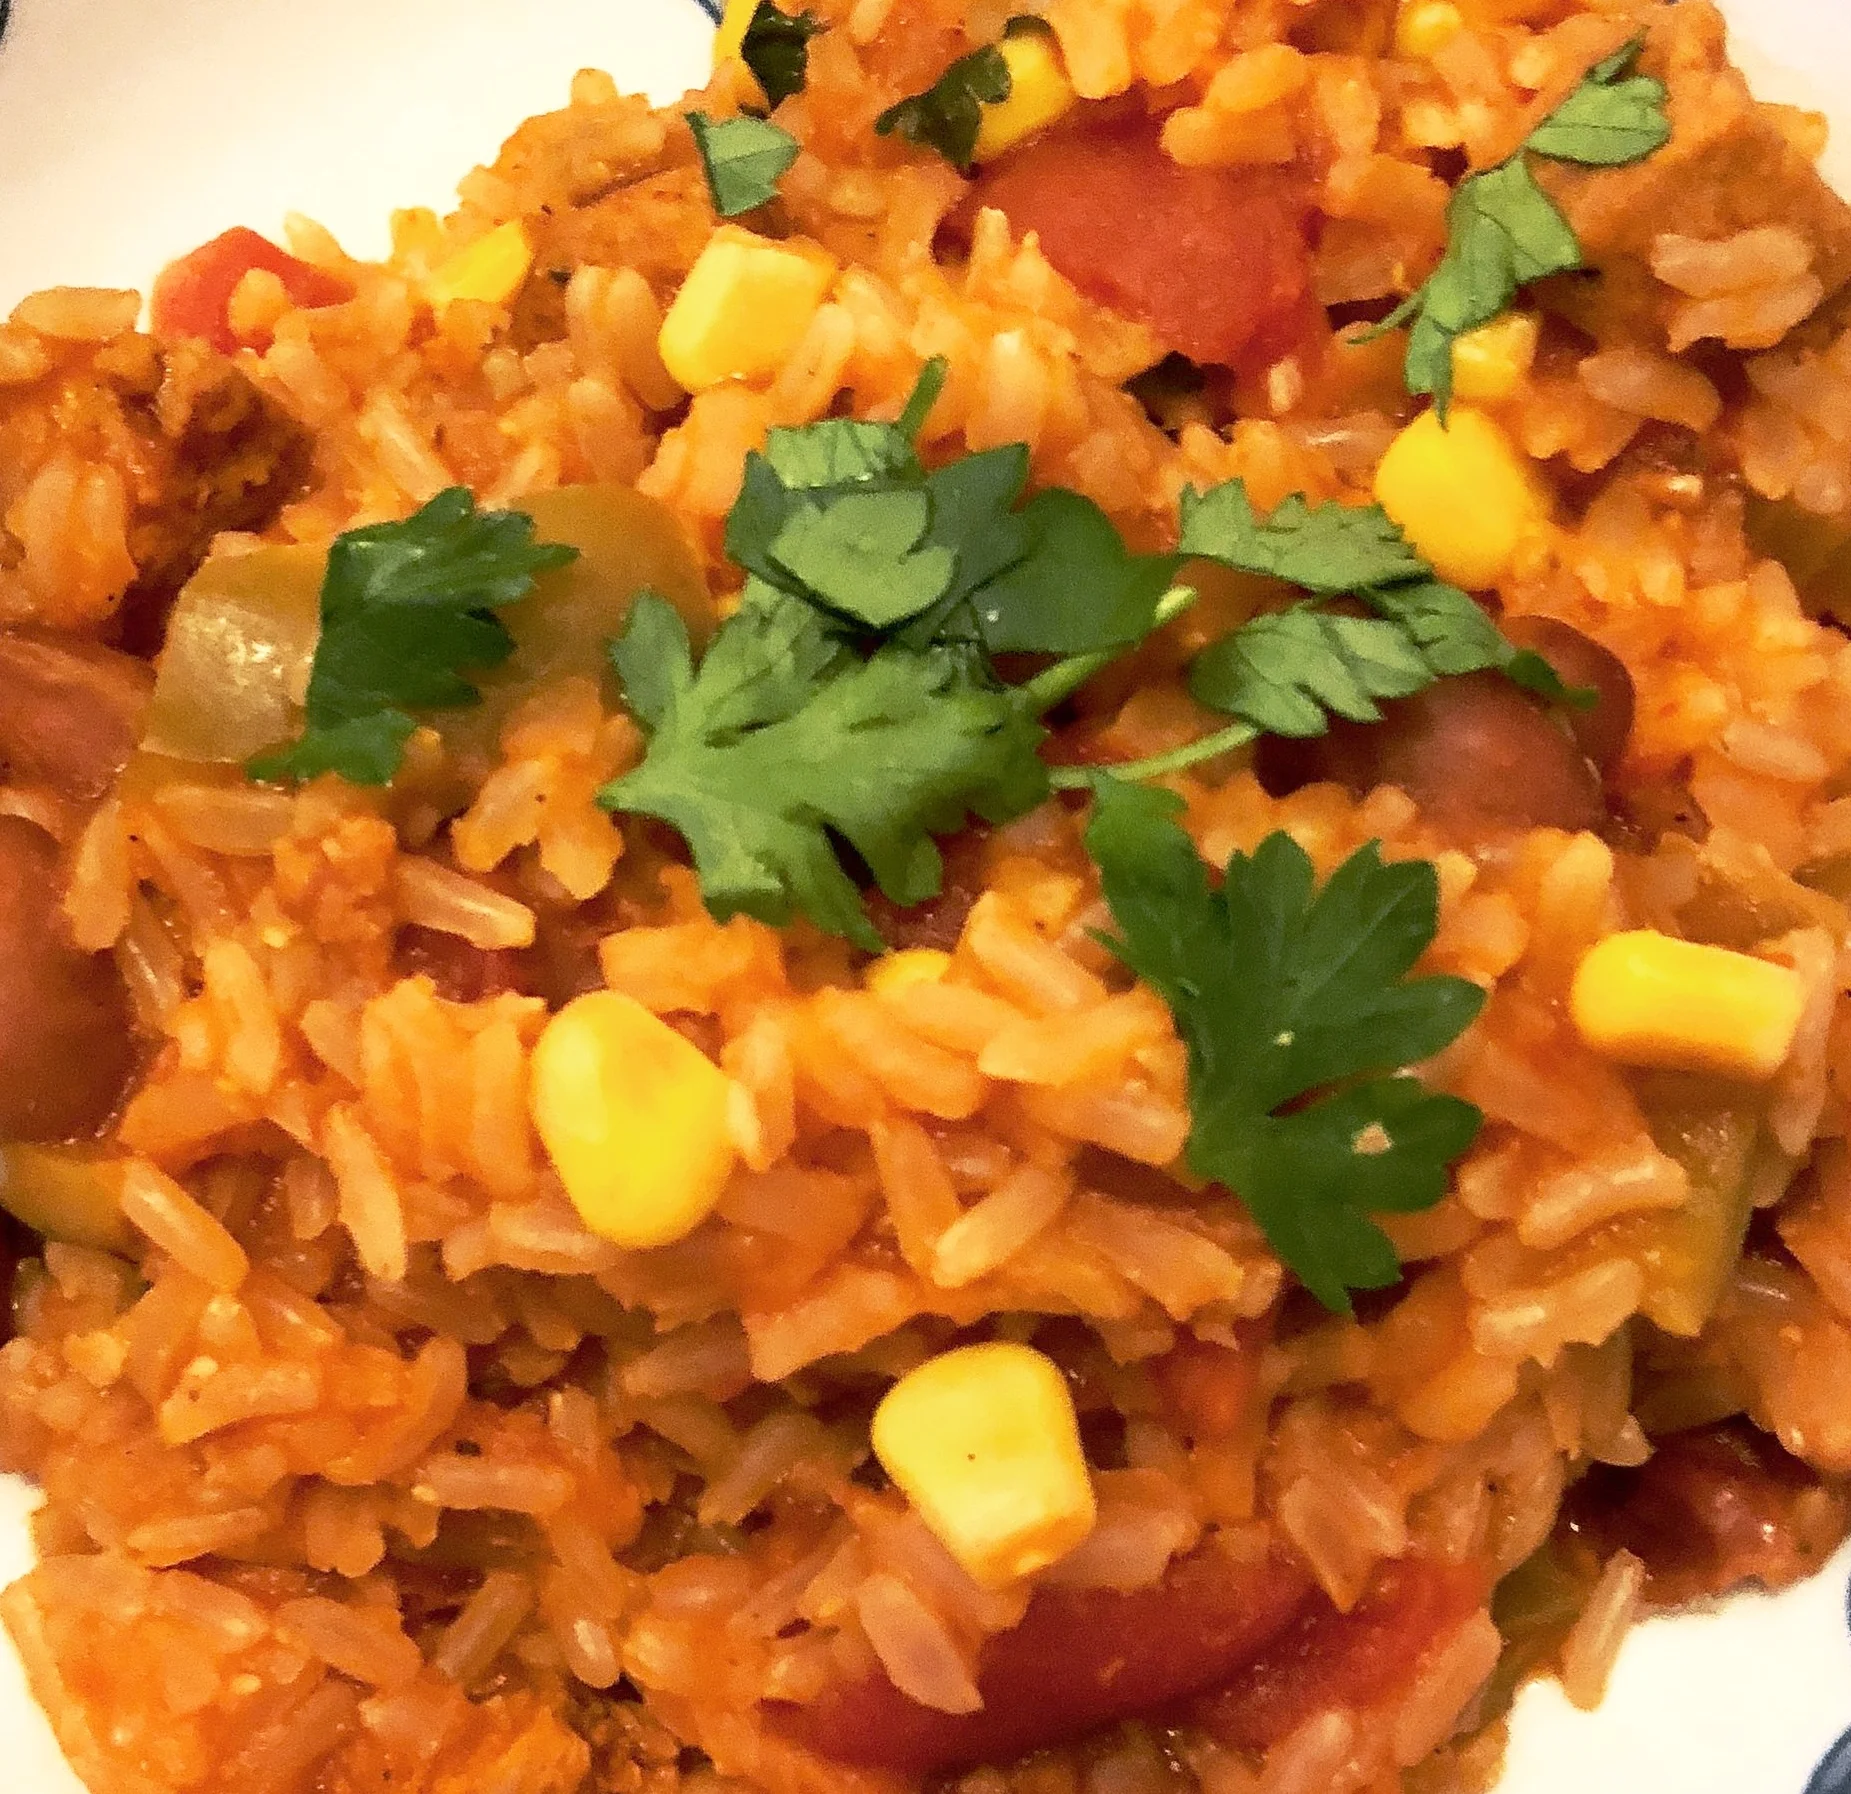
Jambalaya
~under $1.50 per serving
Remember when I said I didn’t love Jambalaya? Well, I take that back. My favorite meal this week was definitely the Jambalaya (you can find the recipe below). This was the perfect comfort food for the cold weather we’ve been having.
As you know from previous posts, I love New Orleans food. Jambalaya actually was never a favorite of mine, but since doing the plant-based diet challenge, I’ve grown to love rice and beans. I decided to throw this recipe together because I had that large bag of brown rice, two links of Trader Joe’s chicken Andouille sausage and diced onion in the freezer, and had tomato paste and canned diced tomatoes in the pantry. I ended up needing to buy a few ingredients but made sure to find the best deals available.
I wound up buying a can of corn, vegetable broth, celery, parsley, green bell pepper, and red beans. These cost $8.46, which I will round up to $9 to include the fraction of the bag of rice I used. My recipe made 8 servings, costing about $1.13 each.
Not only was this meal cheap, but it tasted great. My husband took 4 servings of this on his trip and I took some to work for lunch the next day. It actually tasted even better to me once the flavors had more of a chance to meld.
The best thing about this meal is that it’s so easy to swap ingredients to make exactly what you want. My husband asked me to add corn, so I did. I wasn’t originally going to include beans, but then thought about traditional New Orleans red beans and rice so I threw those in, too. While this meal wasn’t vegan, it would be really easy to make it work- just take out the chicken sausage.
Vegetable Lo Mein
~$1.14 per serving
The Vegetable Lo Mein that I made mid-week ended up being iffy. I found a great starter recipe to use with my Instant Pot, thinking this meal would be made with minimal effort and turn out delicious. Well…
The lo main had good flavor, but cooking it for the times I was given in the recipe made the noodles a little too soft, although this could have been because I used fresh lo mein noodles from my Asian grocery store. I was seriously impressed that a pound of freshly made noodles only cost $1.79.
I mixed up this recipe by adding fresh ingredients that I found on sale, like bok choy and a shredded coleslaw mixture. This ended up making 6 servings, each costing about $1.14. Another plus to this recipe was that I had a ton of vegetable scraps left over. I threw them into a plastic bag to make vegetable broth the next day.
Mexican Quinoa Stuffed Zucchini
~$0.75 per serving
My last big meal of the week was Mexican Quinoa Stuffed Zucchini. For this recipe, I used my snack, Cowboy Caviar (see recipe below), with some quinoa as a filling. I was inspired by this recipe for stuffed zucchini and made it my own. For this recipe, I really only borrowed the idea of stuffing the zucchini, but I did make their “cheese sauce” recipe. Lucky for me, I had all of these weird ingredients on hand for the sauce, like tahini and nutritional yeast, from my 30-day plant-based eating challenge.
The sauce was oddly addicting even though it wasn’t really much like cheese at all. It kind of reminded me of a lemon-mustard combination. It definitely went well with the zucchini and quinoa mixture and I will probably make it again as a topping. Since I had already made the Cowboy Caviar and was snacking on it all week, I really just had to add the two zucchinis to my grocery list, which ended up costing $1.49, making this meal cost a total of $0.75 per serving. These zucchinis ended up being delicious and filling, and I had enough leftover quinoa for a few more meals.

Mexican Quinoa Stuffed Zucchini
Photo credit: Alyssa DelSoldato
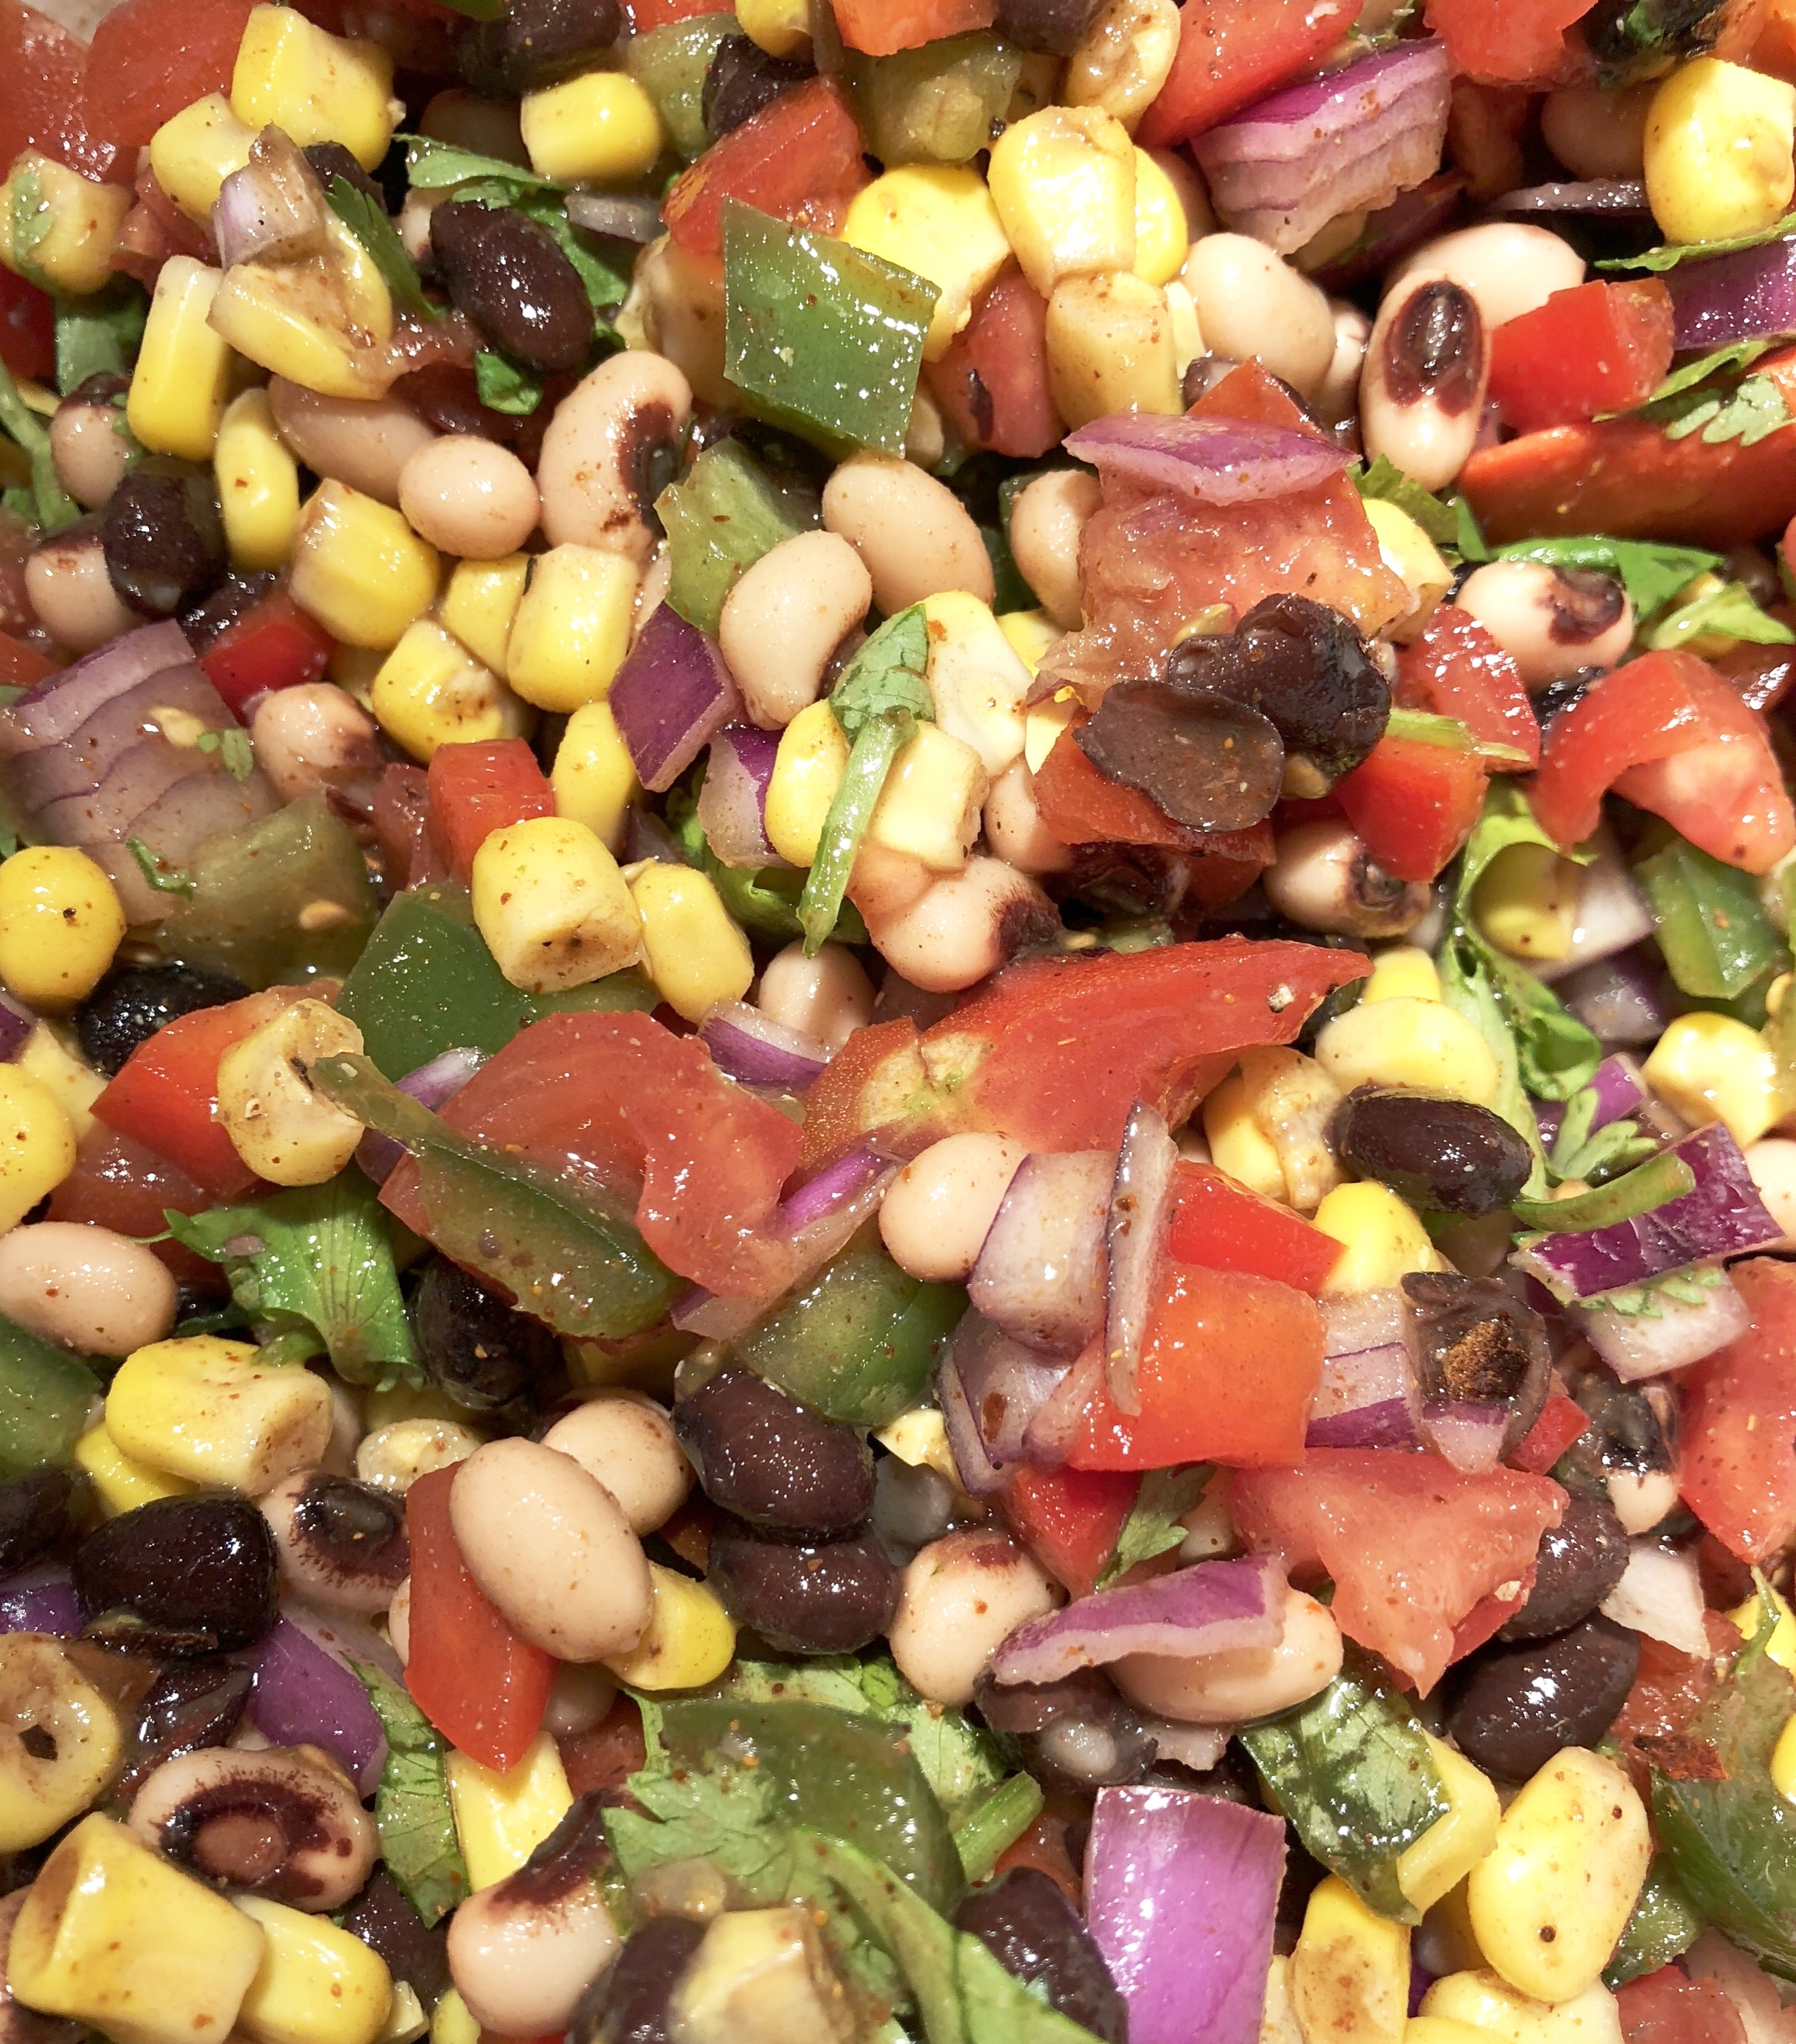
Cowboy Caviar
The Cowboy Caviar is everyone’s favorite in my family. I was recently reminded of how much I loved this over the holiday. My mom knew that this would be a good dairy-free appetizer that I could enjoy following my new plant-based eating style, and I could have eaten the entire tub of this stuff on my own. I even used some of the leftovers in some of my leftover vegan mac ‘n’ “cheese” and realized that this appetizer can really be used for so many things.
I know a lot of people who make this dish and the recipe varies slightly with each person. Some people add avocado into theirs, some add hot sauce. You can easily make swaps with different beans to make it exactly what you want it to be. I personally like to use black beans and black-eyed peas. My total grocery bill for this was $11.52, which includes pita chips for scooping. That’s not bad considering that this served as a snack for the entire week AND was a component in a main dish.
Recipes
Jambalaya (Serves 8)
*This recipe uses the Instant Pot, but can easily be adapted for stovetop cooking.
Disclaimer: If you are using an Instant Pot, be VERY careful using your pressure release valve— you can easily burn yourself if you aren’t careful. Read the directions carefully and thoroughly, and use the appliance at your own risk.
Ingredients
Jambalaya
Photo credit: Alyssa DelSoldato
2 cups dry brown rice
4 1/2 cups vegetable broth
1 can diced tomatoes (no salt added), 14 oz.
1 can red beans, drained and rinsed
1 can sweet corn kernels, drained and rinsed
1 green bell pepper, diced
1 1/2 cups frozen chopped onions
3 cloves of garlic, minced
1 can tomato paste
3 ribs of celery, diced
New Orleans/Cajun/Creole-style seasoning to taste
2 tsp dried thyme
1 tbsp dried basil
2 links Trader Joe’s chicken Andouille sausage, diced small (optional)
Parsley, roughly chopped
Green onions, chopped
Directions
1. Press the “Sauté” button on the instant pot and sauté the bell pepper, celery, and onion and sausage together (no need to spray the pot or add oil first since the onion is frozen and will add liquid to the pot).
2. After a few minutes, add the garlic and continue to sauté for 30 seconds to a minute more.
3. Sprinkle about one tablespoon of the New Orleans seasoning, the thyme, and basil onto the vegetables, mixing well until they’re coated.
4. Add the rice, vegetable broth, canned tomatoes (with juice), and tomato paste, stirring to make sure everything is coated in liquid.
5. Seal the top to the pot, making sure the pressure release tab is set to the “sealing” position, then press the “rice” button (it will start beeping when it’s ready to start).
6. Once the timer finishes, let the pressure come down naturally for at least 10 minutes. Carefully turn the Manual Pressure Release valve to the “release” position, making sure that your hand or skin is not in the path of the steam. To be extra careful, you can turn the valve with an oven mitt.
7. Once the pressure has come down, you can open the lid away from your body. Add more New Orleans seasoning and any other additional seasonings at this point (maybe cayenne or red pepper flakes). If the dish still looks too wet, you can use the “sauté” feature to help evaporate more of the liquid.
8. To plate, put in a bowl and top with chopped parsley and green onions. Serve with hot sauce on the side.
Cowboy Caviar (Makes one HUGE container)
Ingredients
Cowboy Caviar
Photo credit: Alyssa DelSoldato
1 can black beans, drained and rinsed
1 can black-eyed peas, drained and rinsed
1 can corn, drained and rinsed
1 lb tomatoes, diced
1/2 red onion, diced
1 green bell pepper, diced
1 red bell pepper, diced
1/4 cup rice wine vinegar
lime juice
1 cup cilantro, roughly chopped
Cumin to taste
Chili powder to taste
Salt & pepper to taste
Cayenne (optional)
Directions
1. Throw everything together in a big bowl and mix well, adding seasonings to taste.
Enjoy with crackers, chips, over quinoa, mixed in rice, on top of scrambled eggs, or even as a taco filling!
This week, I learned that it’s totally possible for me (and my husband) to eat healthy with just $40 per week. It requires some real planning and shopping around, but it is completely doable. Of course, the cost will vary somewhat for each person depending on the food prices where you live and what ingredients you already have on-hand.
Did I just get lucky this week? It’s possible, but I am going to continue this challenge for the month of January in order to save up. Anything I would have normally spent on groceries is going straight into my savings.
Do you have a cheap meal to recommend? Post it below in the comments for me to test out!
Whatismyhealth © 2018