
Play Dough
/When I’m not cooking, I take on the role of a Pre-K to second grade science teacher. This year, we received a whole new science curriculum. As we’ve been unpacking it with each lesson, we’ve noticed some things that would be better, either by using different materials or by cutting some things out. One of these changes that I’ve decided to implement is for the first unit for my first graders.
My first grade classes are learning about different plant and animal defenses. Their goal is to create a model of an animal with defenses that can keep it safe from predators. They’re supposed to use clay, toothpicks, pencil top erasers, plastic tokens, and cups to replicate things like an animal body, armor, shells, spikes, etc.
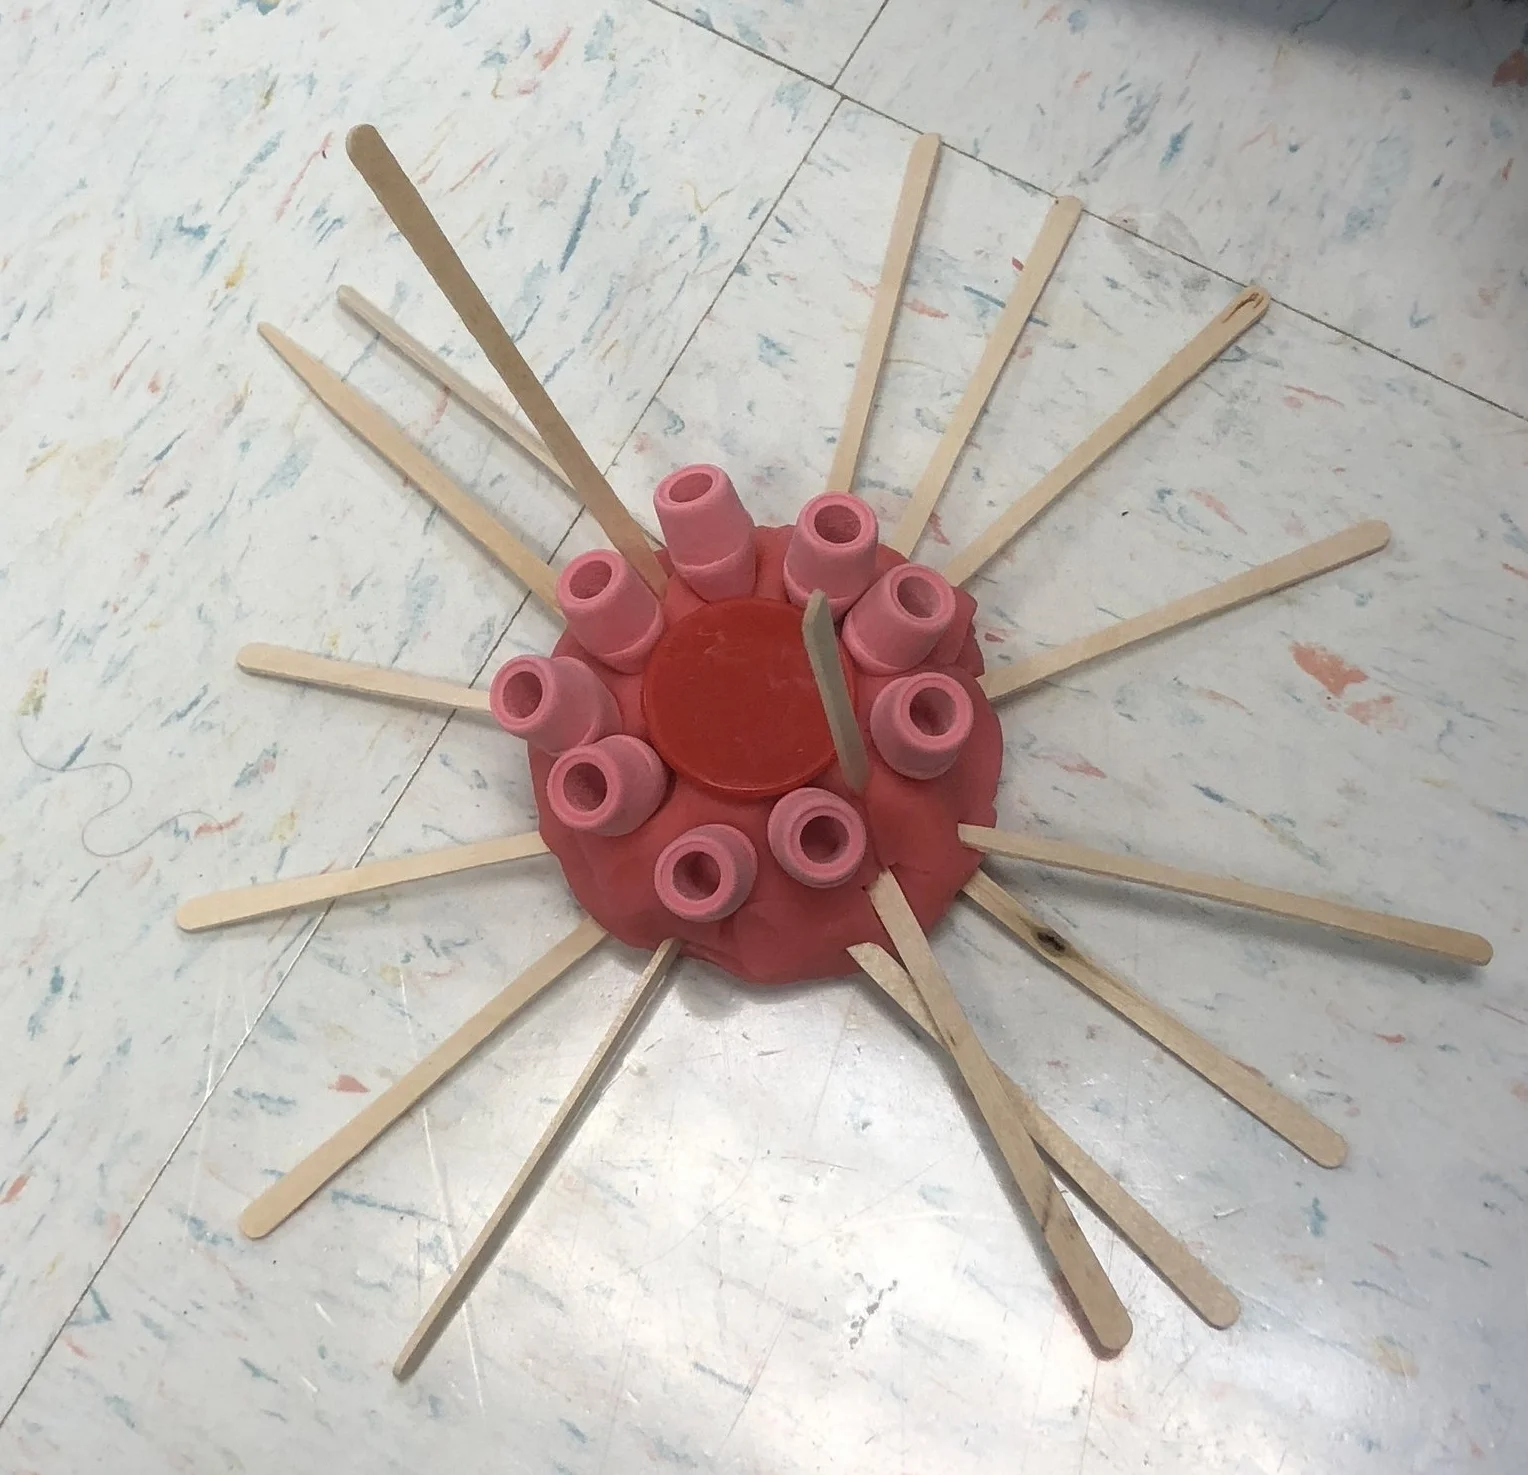
Photo credit: Alyssa DelSoldato
One thing I’ve learned from my first year teaching science is that clay can be a huge mess. It makes your hands and the desks dirty and it dries out really fast. This might be ideal for one-time use, but I’m supposed to be using this for two months with my students. I don’t think clay is going to cut it.
So, I came up with a brilliant solution— why not make my own play dough?
I found that I can cook up a batch for pennies and it doesn’t dry out as easily as clay. Play dough can be messy, but it’s definitely a lot easier to clean than clay. Plus, the children are comfortable and using this familiar material.
I went to the Dollar Tree and picked up a big bag of flour, oil, and a large container of salt. Three bucks was going to get me a few batches of dough. I’ve made my own play dough in the past and I remember the recipe calling for cream of tartar, which I thought I had on hand in my spice cabinet from a failed recipe for cloud bread. Of course, when it finally came time to cook up some dough, I realized that I did not in fact have cream of tartar.
Cream of tartar is one of those ingredients that my grocery store definitely doesn’t have. So, what to do? After asking Google for a substitute for cream of tartar, I decided to use lemon juice in its place. Turns out, you can also buy a big container of lemon juice from Dollar Tree.
The recipes below are for the large batch (pink play dough in pictures) and one for the smaller batch (blue in pictures). They’re the same recipe, I just did the math for you of doubling/halving to make your life a little easier. The large batch was enough for 15 children to have the equivalent of one full Play-Doh container or a little more. If you’re making the small batch, you can follow the same directions as the large batch!
Large Batch of Play Dough (Recommended for classroom use with large groups of children)
Ingredients
4 cups of flour
4 cups water
3/4 cup lemon juice
1 cup salt
4 tbsp oil (vegetable or canola are best, but others will work)
Food coloring
*Extracts for different scents (optional)
Smaller Batch of Play Dough (Recommended for families)
Ingredients
2 cups flour
2 cups water
1/2 cup salt
1/3 cup lemon juice
2 tbsp oil
Food coloring
*Extracts for scent (optional)
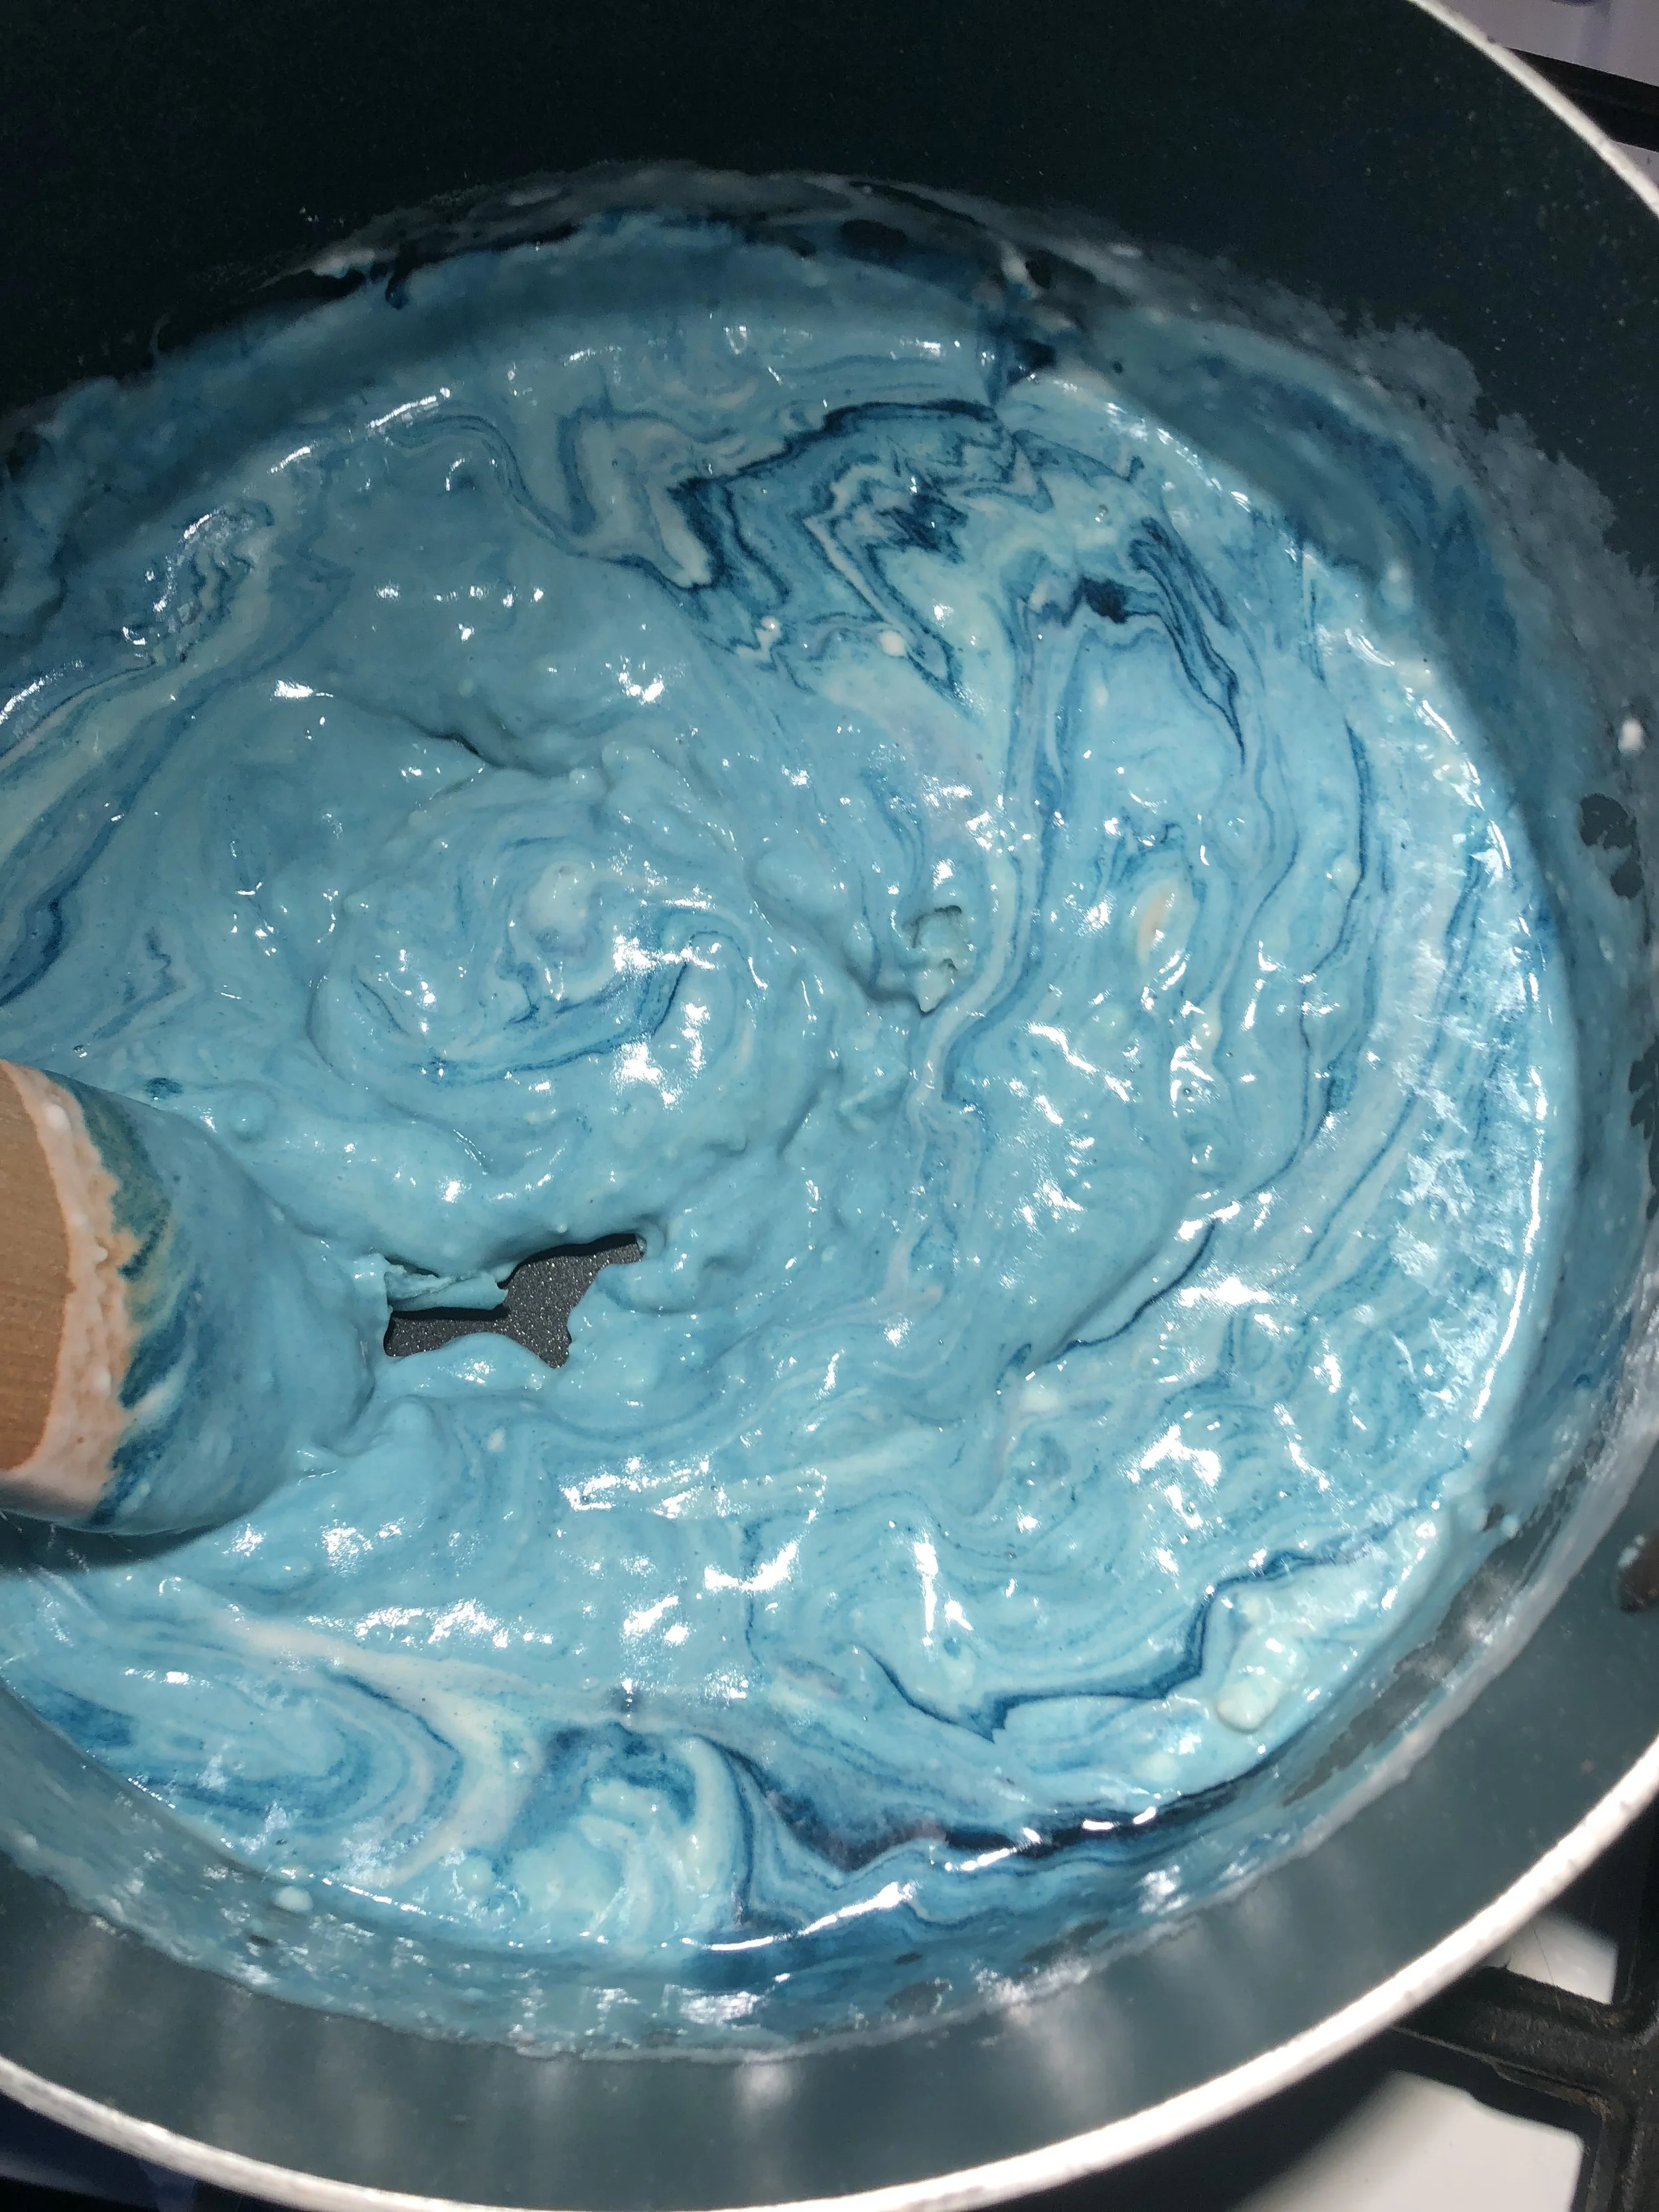
Photo credit: Alyssa DelSoldato
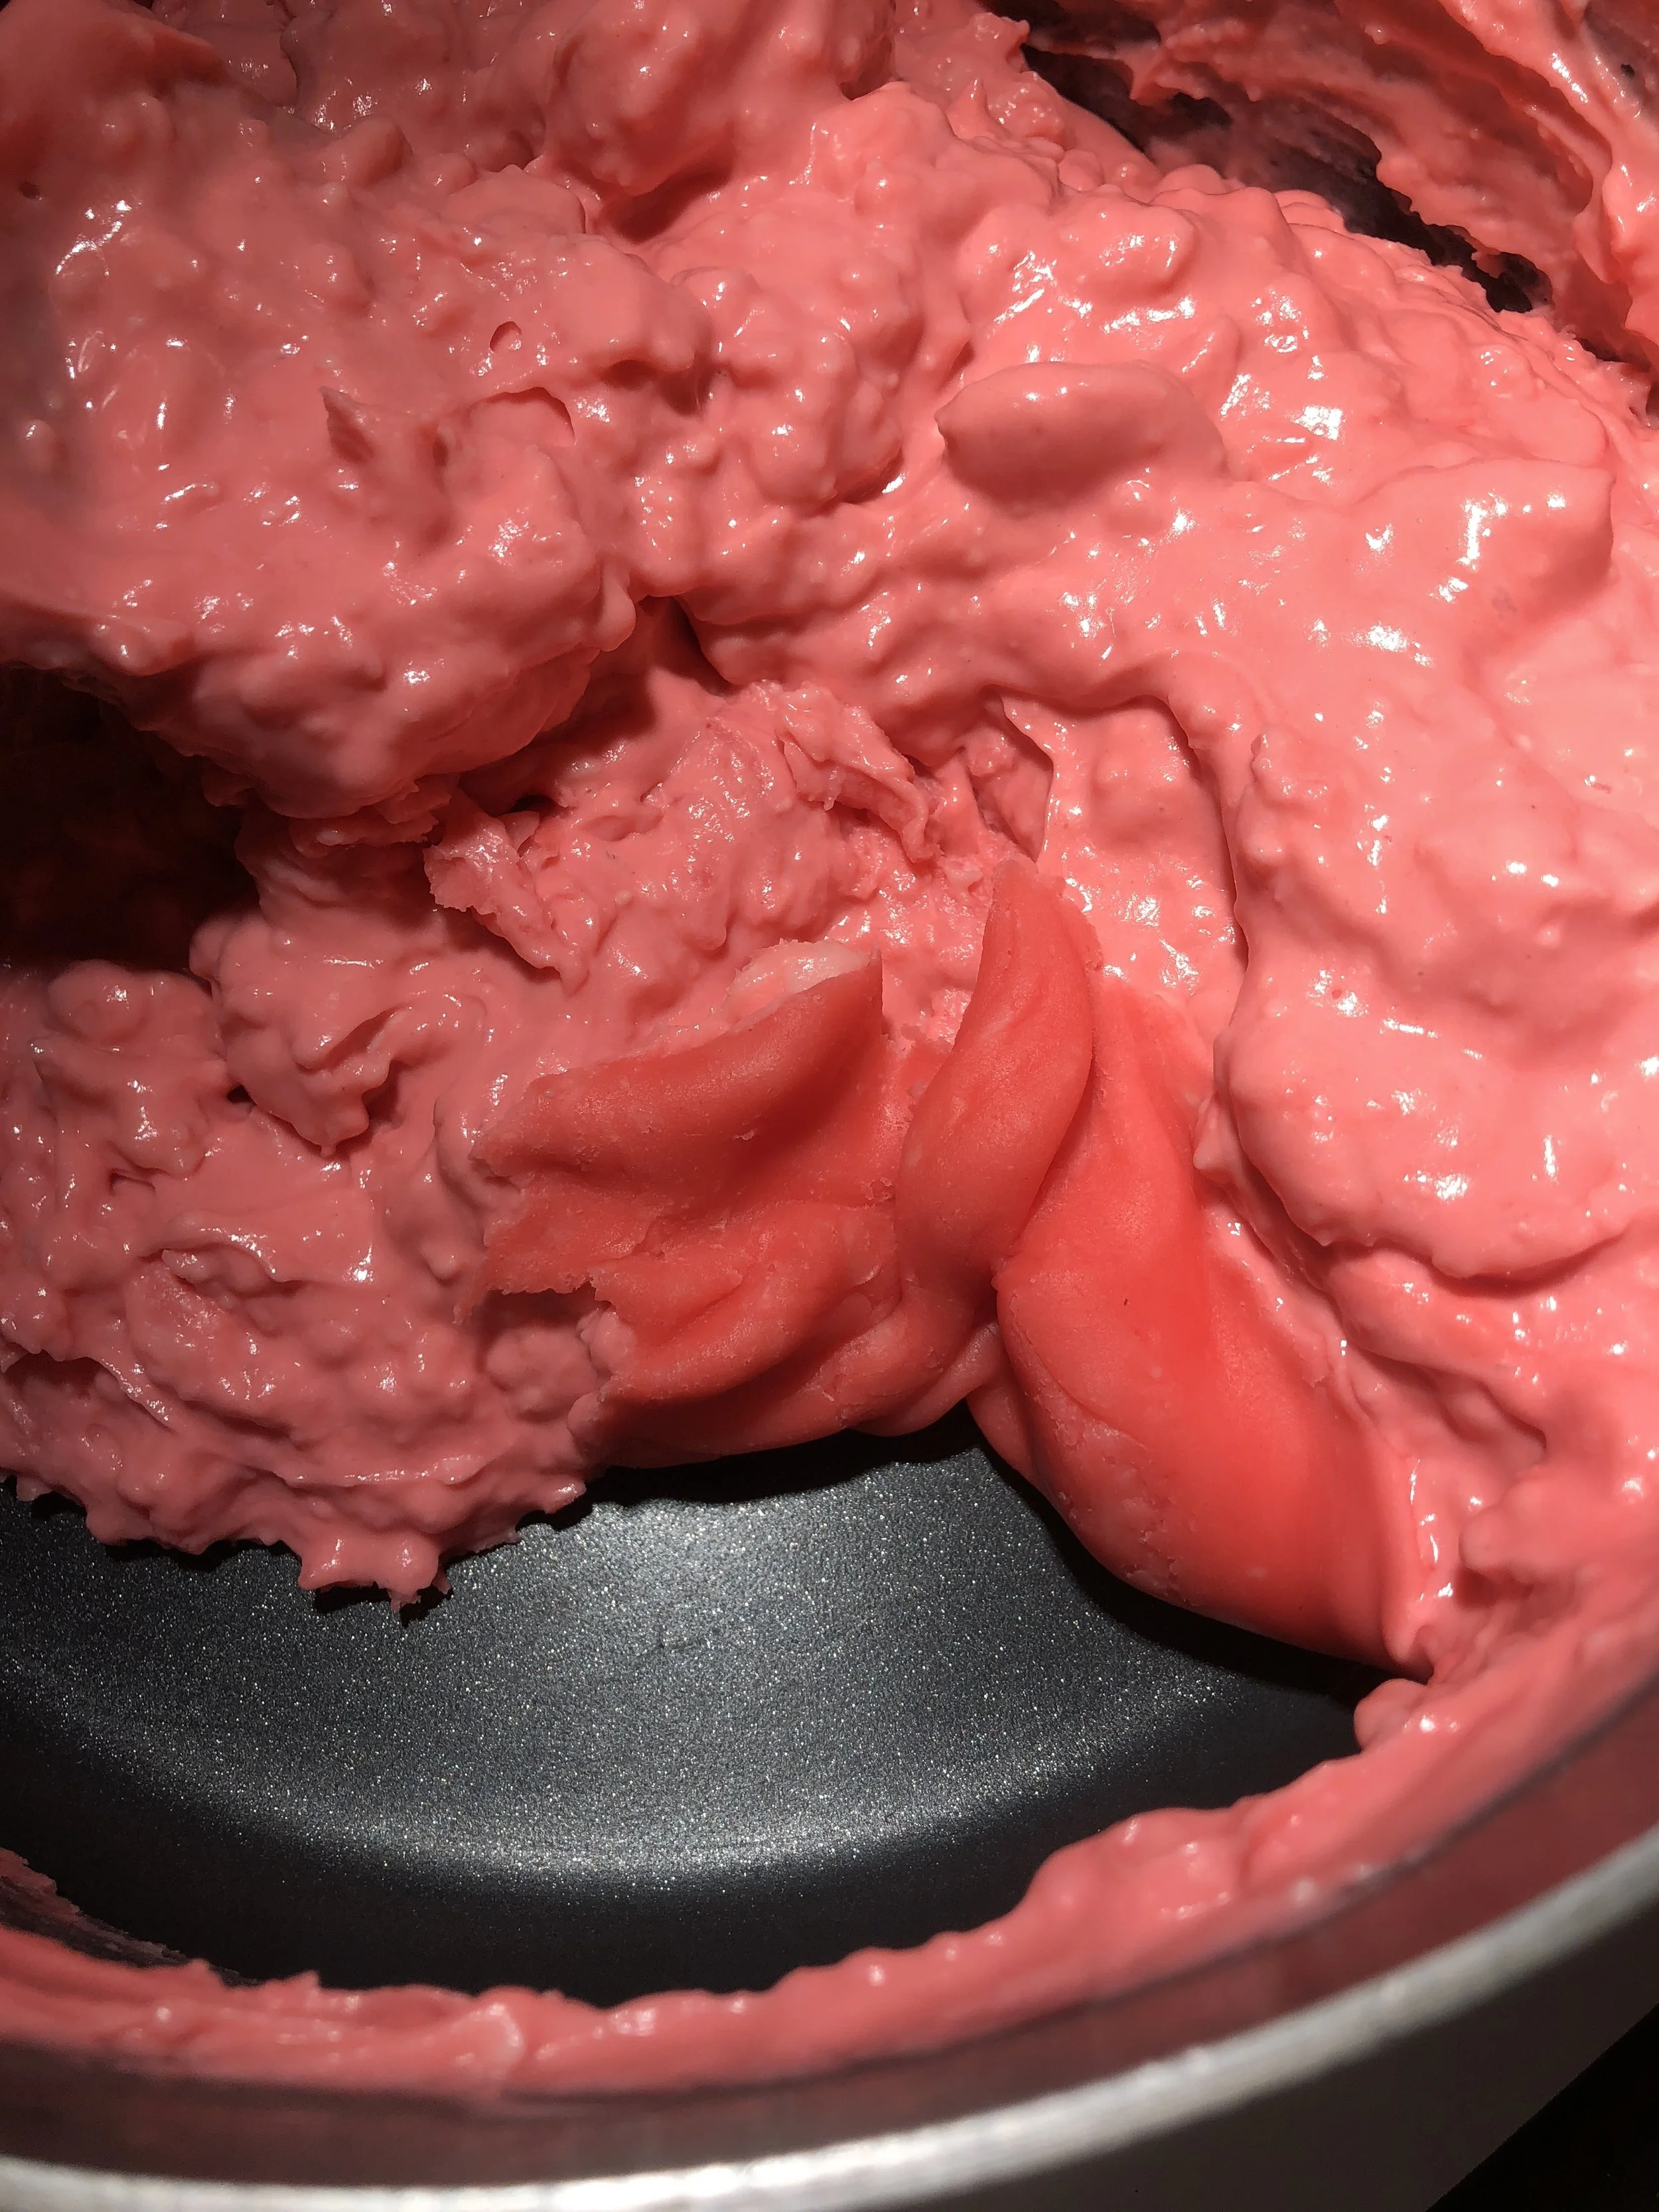
Photo credit: Alyssa DelSoldato
Directions
1) Put all ingredients except food coloring into a large pot on medium high heat. Mix constantly.
2) When the mixture is totally wet and free of dry flour lumps, add in food coloring a little bit at a time until you get the color you desire, and continue to stir. (If you’re using an extract to add a scent to your dough, add that now, too, a little at a time.)
3) After a few minutes, you will notice that the dough is no longer wet on all sides. It will start to take on the consistency of actual dough. Keep mixing until the whole mixture has this doughy consistency.
4) Once it fully looks like play dough, take it out of the pot and put it on a surface to cool, like wax paper, plastic wrap, or a countertop that is easy to clean. Flatten the dough out on this surface so it will cool faster. Since it will still be hot, I recommend flattening it with a pan or cutting board rather than your hands.
5) Check on the dough every few minutes. If you leave it too long, it may start to dry out. When it is finally cool enough to handle, knead it a few times. You may want to reshape it and let it cool longer because the inside may still be hot.
6) Once the dough is totally cool, you store it in an airtight gallon-sized plastic bag.
It felt good to use my stove to create something other than food this week. I was so impressed with the way this play dough came out. My students loved it and it worked great for our project. Not to mention, many of my coworkers have requested this recipe after seeing it— the adults enjoy it just as much as the kids sometimes!
This was probably one of the easiest things to make and it took about 5 minutes. I made a large batch to start and then made several smaller batches of different colors. After making your dough, be sure to put it in an airtight Ziploc bag so it doesn’t dry out. This is the best way to keep it fresh!

I had students work in pairs so this was perfect for my needs. The smaller batch is half of the large, but I still think it will be enough for one class to use if they are working with partners in pairs or small groups. They will just get a slightly smaller ball of dough to work with. I think I’m going to make a batch of this every year just to have on hand for free time for my students. If you’re a teacher looking for a fun classroom activity, or you have kids at home, this is definitely a quick, easy recipe to try for yourself!
Share your comments at the bottom of the page.
Whatismyhealth @ 2018


Craving salty, crunchy snacks but don’t want chips? A quick grab-and-go breakfast? Seed Bark is the answer!